We expose to the right with a digital camera because of the way digital image sensors record information: they record more detailed information in bright areas than in dark areas, which means you see fine details and smooth ranges of tone and colour in bright areas and can see noise in dark areas.
In order to maximize the amount of recorded information, brighten your exposure without blowing out the highlight details. Exposing to the right means the histogram display is pushed to the right, in the brighter values.
This fine-tuning is key to achieve the best image quality.

Photo Technique: : How to obtain maximum focus?
Use a small aperture such as f/16, low ISO, make sure the back of your camera is parallel to your subject and use your tripod.

The Basics of Photography
Composition, exposure, shutter speed, ISO, aperture, opening up, spotlighting, centre-weighted meter: you might be familiar with some of these terms but it’s not always obvious how to adjust your camera accordingly. I offer half-day and multi-days workshops to help you understand and practice the fundamentals of photography. Once you master the basics, you’ll be able to take manual control of your camera and get better results.
All my workshops are given in the field for a hands-on experience. Get in touch so we can arrange for a workshop.

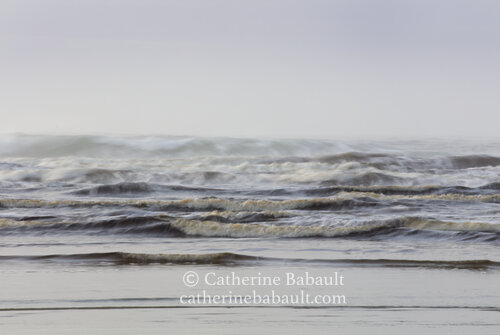
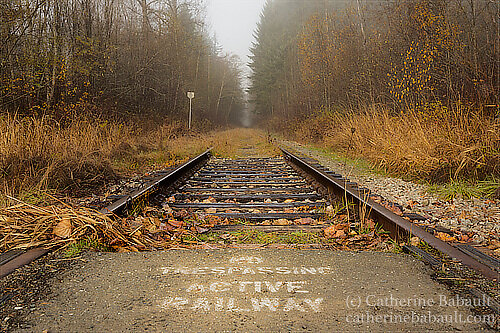
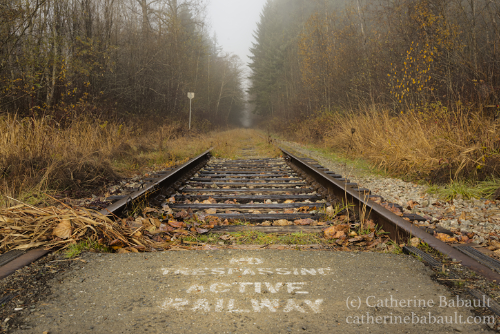
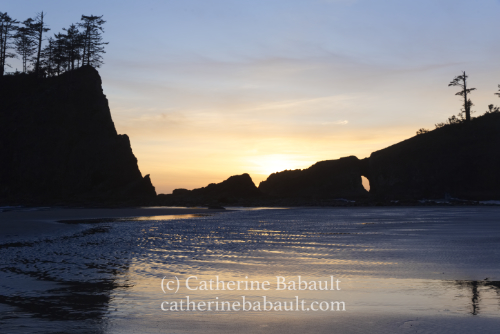
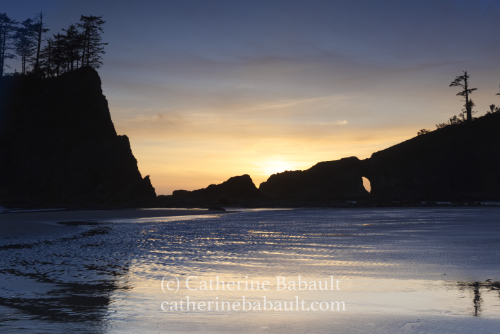
Pacific Rim National Park Reserve
The Pacific Rim National Park Reserve located near Tofino is a popular destination for nature photographers, that’s why I prefer to go there later in the year because it’s less crowded and there is also a possibility of viewing winter storms. Although the weather was calm last week, waves from the Pacific were rolling up the shore in a beautiful display of green and blue tones. I saw a big group of Steller sea lions basking in the morning sun on a small island visible from the beach. I hiked a lot of deserted trails during my stay, which allowed me to immerse myself in my work without being distracted.
The Pacific Rim National Park Reserve is one of my favourite places on Vancouver Island for its natural beauty and unique character. If you’re ready to explore this incredible place, get in touch with me so we can arrange for a workshop.


Happy Holidays And All The Best For 2020!
It has been a very busy year for Catherine Babault Photography and I am looking forward to an even busier year in 2020! I am working on a book project about Vancouver Island and currently getting more landscape and wildlife images. Still chasing the elusive elk…
In 2020, I will be giving many workshops in Tofino and on the East Coast of Vancouver Island. Tofino is very popular with nature photographers and offers great opportunities to improve your skills in the field. If you’re looking for a less touristic destination but still very inspiring, consider signing up for a workshop in the greater region of the Comox Valley, on the East Coast of Vancouver Island. As a local, I know the best places and times to photograph nature and wildlife in that area.
There is still time to order a fine art print for the nature lover in your family, for the holidays. This year, I have added over a thousand images in my archives so you have a big selection. Simply note the photograph’s reference number and contact me with your order.
You can also get a gift certificate for a print or a private workshop.
I wish you all the Best Holidays season and a very Happy New Year!

Black Friday Online Sale - 25 % off
The Holiday season is fast approaching. Have you thought about getting unique fine art prints for the nature lover in your family? On Friday 29 November ONLY, get 25% off on fine art prints when you enter promo code UA9AYCN at check-out.
Images are printed on archival paper for durability. Free delivery in the Comox Valley.
Enjoy!

How to take better images
No matter our level in photography, we all strive to become better at it. Once we get an amazing shot and recognition from our peers, we feel the pressure to surpass that image or, at least, maintain the same level of quality in our work. Here are a few basics to remember:
Find your subject
Ask yourself what makes you pick up your camera in the first place, what you’re interested in: puppies, bears, birds, people, derelict places…
Do your research
Find out more about your subject’s behaviour, the best times and places to photograph them. Study maps, wildlife life cycles, animal tracks and droppings, almanach, tides tables, local news… Explore your area on foot and note your observations. Determine the most favourable type of weather based on the intended mood of the image. Visualize your shot. Evaluate travel time to location and preparation time in the field. Keep all your notes in a notepad.
Know your camera
Make the most of your camera. No matter the (limited or extensive) range of settings, you have to know their function, location on the menu and how to quickly adjust them. Read the manual. That’s right, read the entire camera manual. The more you know about your camera, the most you’ll get out of it.
In the field
With all that knowledge in hands, you get to location, find your subject, frame it and press the shutter button. Next, check the strength of your composition, the sharpness of your image and verify the exposure on the histogram. It’s important to take your time in the field because mistakes cannot be fixed at home, even with the best photo editing program. An out-of-focus image is an out-of-focus image. A badly composed image will remain a badly composed image - forever.
Back at home
Once you display your images on a bigger screen, study them closely and judge their quality. What worked, what didn’t? Why? What can be improved? How? Find resources that can help you improve your techniques or artistic vision. The best way to progress is to learn from your mistakes and practice a lot. The more you practice, the better you’ll become, just like an athlete.
Be unique!
Get inspiration from your favourite photographers but avoid copying their style. Find your own voice. It’s okay to be different and not follow the latest trend. Your images will be more meaningful if they reflect your own vision and sensibility towards the subject.

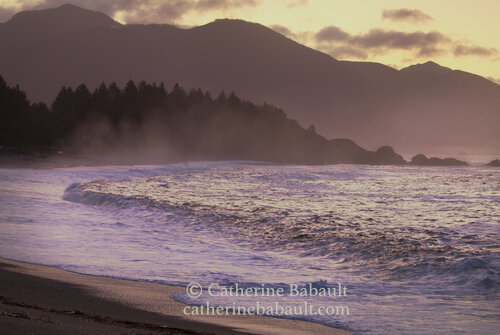
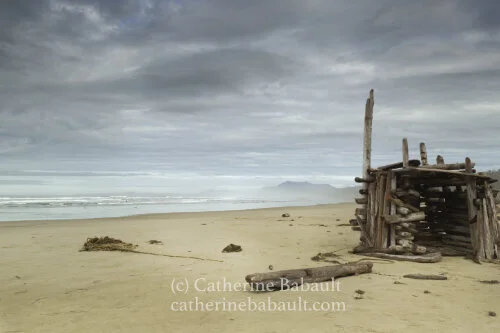
Photo Adventure in Yuquot, BC
I recently returned from Yuquot, a historic village located on Nootka Island, on the west coast of Vancouver Island. The land has been inhabited by indigenous peoples since time immemorial. In 1778, Captain James Cook became the first known European to land in the area. Colonization ensued with its lasting impact on local communities. Today Yuquot is a permanent home to a few people only.
I reached my destination by floatplane. Weather was poor and landing was not guaranteed but we made it safely. After dropping my bags at the rented cabin, I immediately headed out with my camera despite the heavy rain and wind. I wanted to explore the area and find potential photo opportunities in preparation for the next few days.
During my stay in Yuquot, I had the opportunity to witness sea otters feeding on sea urchins and a mink running along the shore. I was hoping to see more wildlife and photograph sea wolves (and black bears) but I didn’t see any signs, tracks or droppings. Although I had to sometimes work with hard light and I captured only a few images of what I had envisioned, I liked my adventure. I realized that I was well prepared for the challenging conditions such as starting a fire with soaked logs! I enjoyed the amazing ocean view from my rustic cabin, the sound of crashing waves at night and the floatplane journey over Muchalat inlet.


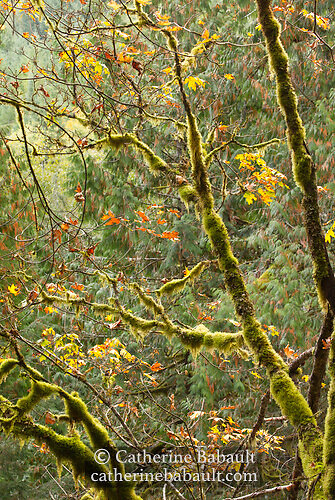
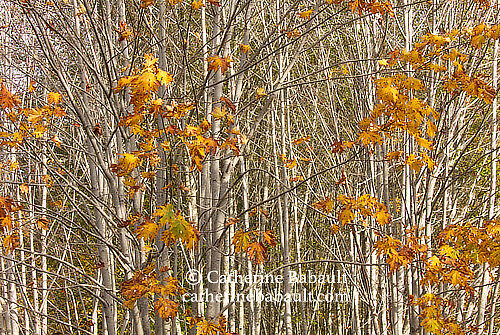
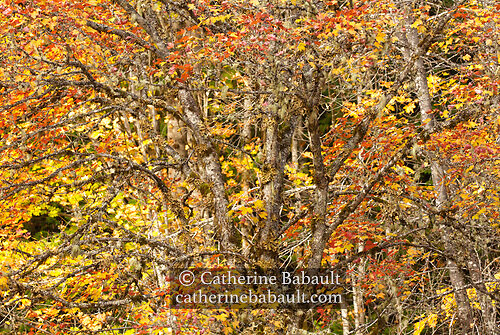
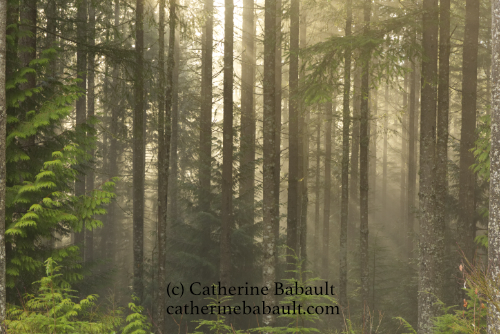
Autumn Vibes on Vancouver Island
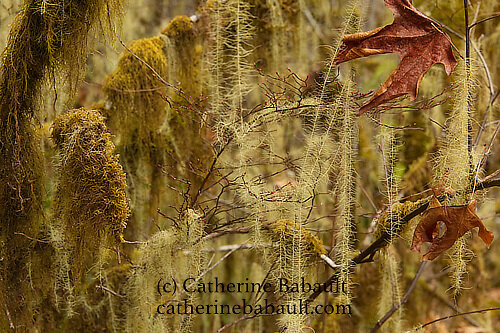
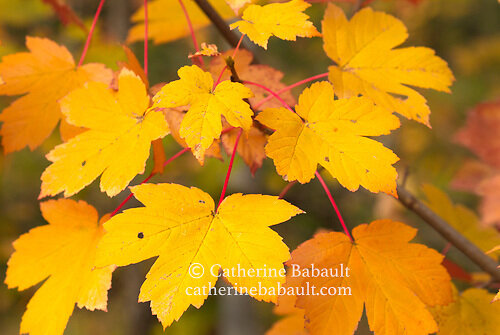
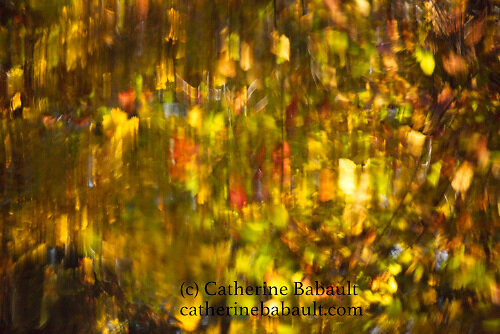
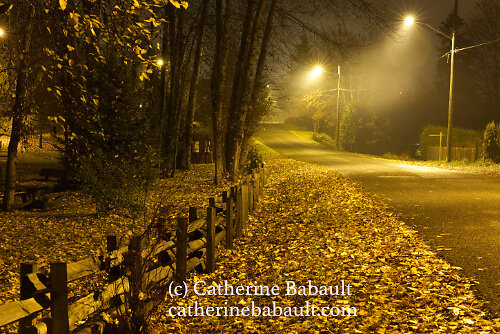
Change of season can mean a change of subject for nature photographers. During the autumn on Vancouver Island, I turn my attention to local forests with deciduous trees like maple trees. They produce various shades of yellow, orange and red and are some of my favourite subjects to photograph at this time of year. I often return to the same woodlands several times during the season to capture the progression of the colour change. I visit these spots during the day, at night, and in various weather conditions: wind, fog, light rain or cloud covered. Each situation tells a different story.
When I walk in the forest, I look for patterns, shapes and texture. I look up, down, I lay on the ground, get on my knees, stand on boulders, as I look for a unique perspective on my subject. I like simple compositions. When I frame my subject, I make sure that they are no distracting elements and no lines leading the viewer’s eye out of the frame. Only then I press the shutter-release button.
I hope you find your own inspiration in the woods.


Fine Art Prints Sale!
Triangle of exposure
Three elements constitute the triangle of exposure: aperture, shutter speed and ISO:
Aperture (f/N): light passing through the lens
Shutter speed: how long the shutter stays open
ISO: image sensor’s sensitivity to light
A small aperture (i.e. f/16) gives a deep depth of field and is usually used for landscape.
A fast shutter speed (i.e. 1/1000 sec) is used to freeze motion, like birds in flight or action shots. It also gives a shallow depth of field.
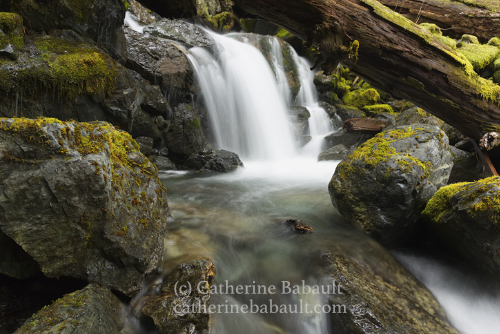
A slow shutter speed (i.e. 1/4 sec) is great for motion blur like milky water effect or rain streaks. Slow shutter speed is also used for night photography or poorly lit areas. In any case, a tripod is highly recommended for long exposures.
Before you adjust the aperture, shutter speed and ISO on your camera, you need to ask yourself: What effect do I wish to create? What is the mood of my image? What am I trying to tell?
Use the light meter in your camera to help you get the proper exposure. Light is measured in Exposure Value (EV) and typically displays in cameras from - 3 EV to + 3 EV
-3 _____ -2 _____ -1 _____ ∆ _____ 1 _____ 2 _____ 3
under exposed correct expo. over exposed
Once you’ve taken your shot, check the histogram and readjust your exposure if necessary.
Time to practice. Let me know how it goes!


Solo Exhibition at The Hub
If you’re in the Comox Valley in August, check out my solo exhibition at The Hub, 545 Duncan Ave, Courtenay, BC. I will be showing some of my best images in big format! 24 x 36 inches, the perfect size for that empty wall in your living-room or office.
I am also featured in the Comox Valley Record, page 19, issue of 30 July 2019.

Composition
Composition can be daunting. The good news is you can learn about it and get better with time and practice!
When I’m in the field, I always look for interesting shapes, patterns, lines and texture. Once I find a potential subject, I evaluate the intensity of the light, its direction and the need to use filters or not. I identify distracting elements, determine my focal point and move around to find my composition. I establish the depth of field, what should be in focus and which lens to use. Then I set up my tripod, which is essential in order to get sharp images. After taking my shot, I check the histogram and the clarity of my image on the back screen. From there I can adjust my composition accordingly. I find that seeing my image on the small screen tells me right away if the composition is good or not.
I believe that a poor image cannot be fixed with a software so I prefer to take the time to compose my images while I am in the field. I also prefer to spend my time outside rather than in front of my computer!
If you’re ready to learn how to get better images, sign up for an upcoming workshop or ask for a private workshop.

Get off Auto, create your best images this summer!
Just added 3 workshops in English and 3 in French, all in the Comox Valley, and on Saturdays afternoon.
Learn how to use your camera on manual mode
Learn about exposure, depth of field, focus, and key elements of composition
Use technical and creative elements together to improve your images
Get more confident with your camera and your skills
Get more one-on-one time by being part of a small group of 5 participants
Take your newly acquired knowledge to your next trip

Graduated ND filters
Graduated neutral density filters, or graduated ND filters, are used by photographers to control very bright areas of a scene. A graduated filter is made of glass which is half dark and half clear with a soft or hard edge between the two parts. Graduated ND filters come in different density, typically from one to 10 f-stops.
Fix or hand-held the filter in front of your lens. Place the darker area over the part you wish to darken (i.e. bright sky). The clear part of the filter will keep its normal brightness. You’ll notice that once you have placed the filter in front of your lens, you’ll need to re-adjust the exposure. You can use a graduated filter to emphasize an area of your image by darkening a less important area, knowing that the viewer’s eyes are naturally attracted by lighter areas in a photograph.
Note: The transition between the dark and clear parts of a filter can create an unnatural line in your image so use the proper density filter.


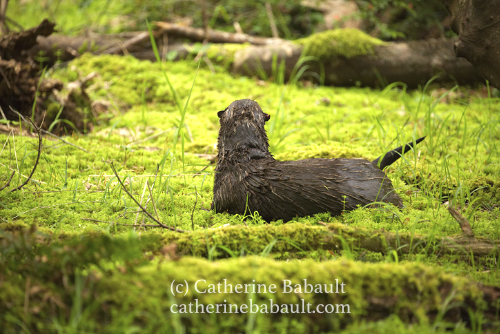
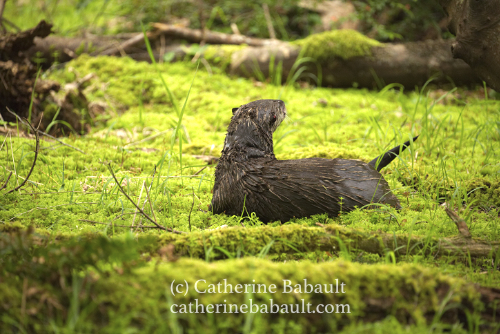
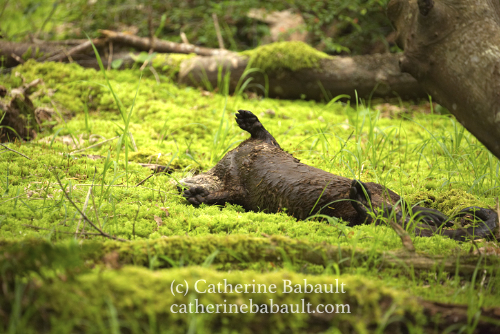
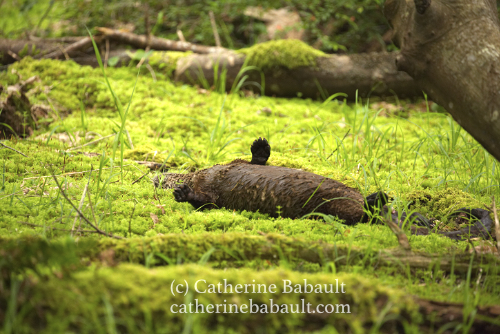
What wildlife really does when humans are away...
First look around and make sure no-one else is here. And then roll in the moss!
River otter, Lontra canadensis


Spring Sale!
25% off on Fine Art Prints! It’s time to redecorate your home or office with beautiful prints. Use promo code SPRING2019 at check-out.

Fine Art Print Sale
Free delivery in the Comox Valley!
Nature Photography - Field Tips
It’s mating season and if you are into that kind of pictures then there are a few things to consider before heading out.
First you need to learn about your subject: mating call, mating ground, habitat, food source, droppings and even tracks. For bird photographers, there are several websites dedicated to bird songs. Start memorizing songs and calls, it will be easier for you to locate birds once you’re in the field.

Mating season on Vancouver Island, BC, Canada.
Find your subject’s resting or nesting area and return there very early in the morning. Wait for them to wake up and start their day. Did you know that some birds tend to face east in the morning to warm up in the sun? Leave plenty of space for your subject and observe them while they pursue their activities. With a good zoom lens, you’ll be able to capture their routine. Be patient! You might need to stand still in inclement weather or in an awkward position for a very long period of time before you get a rewarding image.
I hope you enjoy the awakening of nature as much as I do!
8 New Nature Photography Workshops on Vancouver Island
Spring has sprung and things are moving for Catherine Babault Photography!
An article about Catherine Babault Photography was published in the March edition of the magazine L’Entr’aînés, a monthly publication of l’Assemblée Francophone des retraités et des aînés de la Colombie-Britannique. You can read it here.
In April I had an interview on Radio Victoria to talk about my workshops and my passion for photography. Listen here.

Vancouver Island Nature Photography Workshops
Eight multi-day workshops have just been added for this summer: 4 in English and 4 in French. They will be given in the greater region of the Comox Valley, in a radius of 60 km. We will cover the art of composition, use of light, creativity and workflow. I will take participants to some of my favourite spots to photograph nature and wildlife. This should be fun!
Check for upcoming workshops and new fine art prints or follow me on Twitter for the latest news!
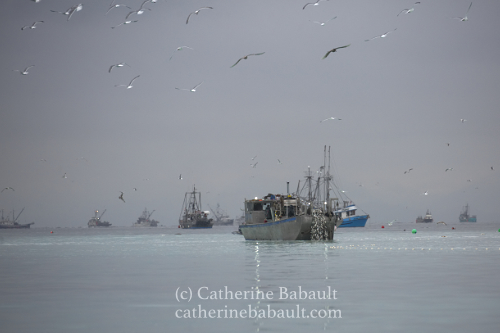
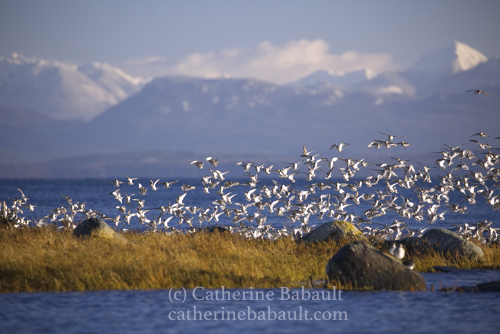
Herring Spawn on the coast of Vancouver Island
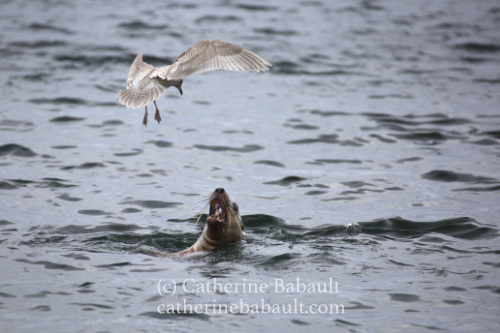
After weeks of anticipation, the Pacific herring has spawned in shallow waters along the coastline of the Salish sea. Birds, mammals and humans have been competing for it since the controversial fishery opened last week.
I witnessed wildlife feeding, and even fighting, for the little silver fish. They could do with some good fish to fatten them up before their offspring are born in the coming weeks. They will certainly need a lot of energy at that time. I also saw a courageous mink running back and forth to get herrings from the shoreline, while keeping an eye on eagles perched on tall trees. It was going so fast, I had a hard time to keep track of it with my big lens. The light was great for photography as the sky was overcast and it was very early in the morning.
Enjoy these few images and if you wish to see more, go to my portfolio or in my stock images.