User-agent: facebot User-agent: twitterbot User-agent: Photon/1.0 User-agent: CCBot User-agent: GPTBot User-agent: ChatGPT-User User-agent: anthropic-ai User-agent: FacebookBot User-agent: Amazonbot User-agent: Applebot Disallow: /

composition

How did I create this image

Camera: Canon EOS 5DS R

Lens: Canon EF100-400mm f/4.5-5.6L IS II USM, with a focal length at 400 mm

f/11, 1/80 second, ISO 1600

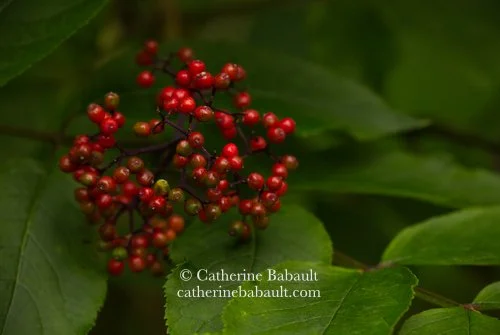
Participants to my photo workshops often ask me about my thought process when I shoot. In this case the first thing I noticed, while walking in the forest, were the red berries and green foliage. When we look at a photograph or a painting, our eyes are unconsciously attracted to elements in red in the overall composition. In addition, red and green are opposite to each other in the wheel of colour, they are complementary colours like blue and orange, and yellow and violet. The use of complementary colours in photography creates a bold image.

My next step consisted of framing my subject so I moved around it to find the best angle. Should I look down, look up, be at eye-level, where is the light coming from? I also took into consideration distracting elements such as bright areas, leading lines, branches, damaged foliage, etc. I chose a telephoto lens to isolate my subject and I used a tripod for stability. Next I thought about the mood of my image and determined the depth of field, aperture and shutter speed. I chose to underexpose by one full stop. I also used a polarizing filter to suppress the reflection of light on the shiny surface of the berries.

In conclusion, I prefer to take my time in the field than spending hours in front of my computer screen trying to fix my mistakes. Afterall I love nature much more than my computer!

If you would like to learn more about my photo workshops, please contact me. I will be more than happy to help you hone your skills in nature and wildlife photography.
Finding your composition

I used four different methods for these photos. When I find a subject, I take the time to think about how I want to represent it. Do I want to isolate it from its environment by using a short depth of field or by framing it closely or on the contrary do I want to place it in its environment with a wide depth of field and framing it in full? I also look for a unique composition.

Subject in its environment

Vertical format, use of a telephoto lens to isolate the subject and eliminate distracting elements like branches, the colour of the leaves pops against the brown bark of the trees and the light blue background makes it all stand out.

f/5.6 ISO1250 1/20 second

Horizontal format, use of a telephoto lens to isolate the subject, large depth of field, subject off centre, the subject stands out against the darker background and the yellow grass.

f/9 ISO3200 1/50 second

Close-up

Close-up to eliminate distracting elements and use of complementary colours (red and green) to create a bold effect.

f/9 ISO3200 1/50 second

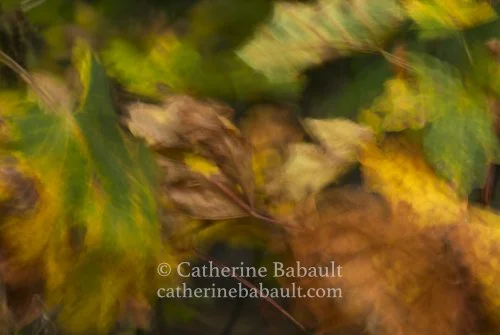
Close-up to eliminate distracting elements and long exposure to blur the leaves and give the impression of movement.

f/18 ISO200 1/2 second

The best way to learn is to practice in the field with a professional. I invite you to register for my workshop Fall Colors on Vancouver Island from 12 to 15 October 2023. We will spend three days in the field, entirely dedicated to nature and wildlife photography. You’ll have my full attention by being part of a small group of 5 people. This is a popular workshop, sign up early!

Spot Distracting Elements

When I am on a photo excursion in the forest, the red-legged frog tends to appear when I least expect it. Their colour is an excellent form of camouflage. Often, it is their leap at my approach that catches my eye. During any chance encounter with an animal, it is sometimes difficult to predict their reaction: will they run away or stay put? That’s why my first reaction is to stop and anticipate their intentions. Then I started moving cautiously to avoid frightening them while I think about my composition and my distance from the animal.

red-legged frog, Vancouver Island, British Columbia, Canada. © Catherine Babault

Spot the distracting elements in this image.

I determine where the light is coming from and if there is a backlight. I identify elements such as a branch in front of the frog or any other shape or object that might distract the attention of the person looking at the photo. I move slowly and, once in position, I carefully deploy my tripod. A stressed frog will puff up its abdomen to deter predators. I therefore keep an eye on my subject to assess their level of comfort; if I notice that they are stressed, I leave even though I have not got a shot. The animal wellbeing is more important to me than my portfolio. Once the camera is mounted on the tripod, I adjust the settings and frame based on the intended result before releasing the shutter. Then I check the composition and histogram on the camera screen.

Because it is a chance encounter with a wild animal, everything happens very quickly and yet quietly so as not to stress it. Also I don’t overstay to avoid disturbing the animal in its routine.

Final result after I repositioned myself. Photo in full format.

Depth of field - Profondeur de champs

Depth of field

I chose to photograph the back of this flower because I wanted to create an original portrait so I used a different perspective than the classic image of flowers. In order to have a blurry background, I used a narrow depth of field by opting for a large aperture of f/5.6. To demonstrate the depth of field in a composition, I took a second shot with a smaller aperture of f/14: we can see more details in the background because the depth of field is wider.

f/5.6, 1/500 second, ISO2000Canon EOS 5DS R - Canon EF 100-400mm f/4.5-5.6L IS USM

f/5.6, 1/500 second, ISO2000

Canon EOS 5DS R - Canon EF 100-400mm f/4.5-5.6L IS USM

f/14, 1/80 second, ISO2000

f/14, 1/80 second, ISO2000

Profondeur de champs

J’ai choisi de photographier l’arrière de cette fleur parce que je voulais créer un portrait original, j’ai donc utilisé une perspective différente que la photo classique de fleurs. Pour avoir l’arrière-plan flou, j’ai réduit la profondeur de champs en optant pour une ouverture de diaphragme élevée de f/5.6. Afin de démontrer la profondeur de champs dans une composition, j’ai pris une deuxième photo avec une ouverture de diaphragme réduite de f/14 : on voit plus de détails en arrière-plan car la profondeur de champs est plus large.

Book Release: Vancouver Island Wildlife - A Photo Journey

As you all know, over the last year, I have been working hard to photograph interesting species that call Vancouver Island home, such as the elusive Roosevelt elk and the rare Vancouver Island marmot. The result is the creation of my book Vancouver Island Wildlife - A Photo Journey, which is being released in early October.

Divided into two sections, On the Coast and In the Forest, this photographic journey features over 150 stunning images of Vancouver Island’s biodiversity and wild landscapes. This books presents rare and candid moments featuring charismatic animals, such as the black bear, sea otter, Roosevelt elk, sea lion, bald eagle, and the rare Vancouver Island marmot as well as intimate portraits of flora species found in the rainforest and in subalpine meadows. Splendid images of moss-covered trees in autumn foliage complete this compilation of impressive photographs. Captioned with anecdotes, and conservation and photographic techniques information, this beautiful book invites you into a natural world with unique ecosystems, and is certain to capture the interest of photographers, travellers and nature-lovers.

Pre-order your signed copy today! Books are shipped worldwide.

An amazing photographic journey in the wilderness of Vancouver Island that presents compelling images of elusive wildlife, stunning landscapes and unique ecosystems.

Roosevelt elk on Vancouver Island

One of my best qualities is stubbornness but I prefer to call it determination. Last autumn, I was determined to photograph the Roosevelt elk in its natural habitat. As a wildlife photographer, I had envisioned some compositions, light conditions, behaviours, etc. In order to achieve my goal, I gathered information from different sources, tracked several herds all over the island, stepped in piles of dropping, snow-shooed in mountains and bush-walked with mosquitoes, but I kept on going because dreams do come true when you put the effort.

_B093855a.jpg

Earlier this month, I found a herd of cows with calves in a field. Calves were feeding from their mothers. The light and the scenery were perfect. These are my first images, I intend to get more this summer for my upcoming photo book.

While wildlife photography is very rewarding (sometimes), I respect animals and their environment: I use a telephoto lens, I don’t harass animals and I don’t overstay. The last thing I want is to stress them, prevent them from feeding or losing precious energy while fleeing from a pesky photographer. I apply this rule to all animals and I hope you do too.

Remember that you can support my small business during these challenging times by getting gift cards, ordering prints online or signing up for a workshop if you live in British Columbia.

_B093844a1.jpg

Stuck at home

The pandemic triggered unexpected reactions in some people like stockpiling on food and, for some obscure reason, toilet paper. Having fun outside our home has been restricted. After days spent locked in, the concept of time has been altered. We are now finding ways to escape our new reality.

Photo Technique: How to use colours for dramatic effect?

Red, yellow and blue are primary colours for pigment. Violet, orange and green are secondary colours. To create a bold image, use complementary colours: orange and blue, green and red, yellow and purple. Complementary colours opposite each other on the wheel of colours.

Wheel of colours

Wheel of colours

Orange against dark blue

Orange against dark blue

Upcoming Workshops

Photo Technique: How to create a strong black and white photograph?

A simple composition associated with a careful use of geometry, lines, curves, contrast and negative space.

_C6A6993a.jpg
Upcoming Workshops

Photo Technique: How to reduce noise in an image?

There are a few actions you can take:

  • Expose to the right by either opening up the lens aperture or by using a slower shutter speed. An underexposed image later brightened on a computer will result in a lot of noise and other artefacts.

  • Determine your camera’s high ISO capability by conducting a simple test. Place your camera on a tripod and take the same photograph of a subject with dark areas, at various ISO starting at 100 all the way up by increment of full stops. Verify the progression in the amount of noise by enlarging each image on your computer screen.

_ABO9041a.jpg
Upcoming Workshops

Photo Technique: What makes a compelling image?

Many factors are to be considered but professional photographers, photo editors and jury members on photo competitions agree that what makes a compelling image is a unique perspective on the subject, sharpness and good composition. How to create a good composition? Keep it simple! Isolate your subject by getting rid of distracting elements, determine your source of light and use the elements of design: lines, pattern, shape and texture.

Upcoming Workshops

Photo Technique: Depth of Field

A narrow depth of field isolates the subject. It makes it stand out against a blurred background because the viewer’s eye is naturally attracted by a sharp subject. A wide depth of field put the subject into context. The entire picture is sharp so the viewer tends to look at the subject in relation to its surroundings.

Upcoming workshops

Photo Technique: How to use the White Balance?

The colour temperature is measured in Kelvin degrees (k):
- Daylight: 5200 k
- Shadow: 7000 k
- Cloudy, sunrise and sunset: 6000 k
- White light or fluorescent: 4000 k
- Candlelight: 2000 k
Depending on the source of light illuminating the scene, adjust the white balance on your camera by choosing either the preset for Kelvin degrees or the symbol for Cloudy, Sunny, Fluorescent light, etc.

Cold Colour Temperature

Cold Colour Temperature

Warm Colour Temperature

Warm Colour Temperature

Upcoming Workshops

Photo Technique: Expose to the right

We expose to the right with a digital camera because of the way digital image sensors record information: they record more detailed information in bright areas than in dark areas, which means you see fine details and smooth ranges of tone and colour in bright areas and can see noise in dark areas.
In order to maximize the amount of recorded information, brighten your exposure without blowing out the highlight details. Exposing to the right means the histogram display is pushed to the right, in the brighter values.
This fine-tuning is key to achieve the best image quality.

_ABN5341a.jpg
Upcoming Workshops

The Basics of Photography

Composition, exposure, shutter speed, ISO, aperture, opening up, spotlighting, centre-weighted meter: you might be familiar with some of these terms but it’s not always obvious how to adjust your camera accordingly. I offer half-day and multi-days workshops to help you understand and practice the fundamentals of photography. Once you master the basics, you’ll be able to take manual control of your camera and get better results.


All my workshops are given in the field for a hands-on experience. Get in touch so we can arrange for a workshop.

_ABN2901a.jpg
Upcoming workshops

How to take better images

No matter our level in photography, we all strive to become better at it. Once we get an amazing shot and recognition from our peers, we feel the pressure to surpass that image or, at least, maintain the same level of quality in our work. Here are a few basics to remember:

Find your subject

Ask yourself what makes you pick up your camera in the first place, what you’re interested in: puppies, bears, birds, people, derelict places…

Do your research

Find out more about your subject’s behaviour, the best times and places to photograph them. Study maps, wildlife life cycles, animal tracks and droppings, almanach, tides tables, local news… Explore your area on foot and note your observations. Determine the most favourable type of weather based on the intended mood of the image. Visualize your shot. Evaluate travel time to location and preparation time in the field. Keep all your notes in a notepad.

Know your camera

Make the most of your camera. No matter the (limited or extensive) range of settings, you have to know their function, location on the menu and how to quickly adjust them. Read the manual. That’s right, read the entire camera manual. The more you know about your camera, the most you’ll get out of it.

In the field

With all that knowledge in hands, you get to location, find your subject, frame it and press the shutter button. Next, check the strength of your composition, the sharpness of your image and verify the exposure on the histogram. It’s important to take your time in the field because mistakes cannot be fixed at home, even with the best photo editing program. An out-of-focus image is an out-of-focus image. A badly composed image will remain a badly composed image - forever.

Back at home

Once you display your images on a bigger screen, study them closely and judge their quality. What worked, what didn’t? Why? What can be improved? How? Find resources that can help you improve your techniques or artistic vision. The best way to progress is to learn from your mistakes and practice a lot. The more you practice, the better you’ll become, just like an athlete.

Be unique!

Get inspiration from your favourite photographers but avoid copying their style. Find your own voice. It’s okay to be different and not follow the latest trend. Your images will be more meaningful if they reflect your own vision and sensibility towards the subject.

_C6A6993a.jpg

Photo Adventure in Yuquot, BC

I recently returned from Yuquot, a historic village located on Nootka Island, on the west coast of Vancouver Island. The land has been inhabited by indigenous peoples since time immemorial. In 1778, Captain James Cook became the first known European to land in the area. Colonization ensued with its lasting impact on local communities. Today Yuquot is a permanent home to a few people only.

I reached my destination by floatplane. Weather was poor and landing was not guaranteed but we made it safely. After dropping my bags at the rented cabin, I immediately headed out with my camera despite the heavy rain and wind. I wanted to explore the area and find potential photo opportunities in preparation for the next few days.

During my stay in Yuquot, I had the opportunity to witness sea otters feeding on sea urchins and a mink running along the shore. I was hoping to see more wildlife and photograph sea wolves (and black bears) but I didn’t see any signs, tracks or droppings. Although I had to sometimes work with hard light and I captured only a few images of what I had envisioned, I liked my adventure. I realized that I was well prepared for the challenging conditions such as starting a fire with soaked logs! I enjoyed the amazing ocean view from my rustic cabin, the sound of crashing waves at night and the floatplane journey over Muchalat inlet.

Autumn Vibes on Vancouver Island

Change of season can mean a change of subject for nature photographers. During the autumn on Vancouver Island, I turn my attention to local forests with deciduous trees like maple trees. They produce various shades of yellow, orange and red and are some of my favourite subjects to photograph at this time of year. I often return to the same woodlands several times during the season to capture the progression of the colour change. I visit these spots during the day, at night, and in various weather conditions: wind, fog, light rain or cloud covered. Each situation tells a different story.

When I walk in the forest, I look for patterns, shapes and texture. I look up, down, I lay on the ground, get on my knees, stand on boulders, as I look for a unique perspective on my subject. I like simple compositions. When I frame my subject, I make sure that they are no distracting elements and no lines leading the viewer’s eye out of the frame. Only then I press the shutter-release button.

I hope you find your own inspiration in the woods.

Triangle of exposure

Three elements constitute the triangle of exposure: aperture, shutter speed and ISO:

  • Aperture (f/N): light passing through the lens

  • Shutter speed: how long the shutter stays open

  • ISO: image sensor’s sensitivity to light

A small aperture (i.e. f/16) gives a deep depth of field and is usually used for landscape.

A fast shutter speed (i.e. 1/1000 sec) is used to freeze motion, like birds in flight or action shots. It also gives a shallow depth of field.

A slow shutter speed (i.e. 1/4 sec) is great for motion blur like milky water effect or rain streaks. Slow shutter speed is also used for night photography or poorly lit areas. In any case, a tripod is highly recommended for long exposures.

Before you adjust the aperture, shutter speed and ISO on your camera, you need to ask yourself: What effect do I wish to create? What is the mood of my image? What am I trying to tell?

Use the light meter in your camera to help you get the proper exposure. Light is measured in Exposure Value (EV) and typically displays in cameras from - 3 EV to + 3 EV

-3 _____ -2 _____ -1 _____ ∆ _____ 1 _____ 2 _____ 3

under exposed correct expo. over exposed

Once you’ve taken your shot, check the histogram and readjust your exposure if necessary.

Time to practice. Let me know how it goes!

Composition

Composition can be daunting. The good news is you can learn about it and get better with time and practice!

When I’m in the field, I always look for interesting shapes, patterns, lines and texture. Once I find a potential subject, I evaluate the intensity of the light, its direction and the need to use filters or not. I identify distracting elements, determine my focal point and move around to find my composition. I establish the depth of field, what should be in focus and which lens to use. Then I set up my tripod, which is essential in order to get sharp images. After taking my shot, I check the histogram and the clarity of my image on the back screen. From there I can adjust my composition accordingly. I find that seeing my image on the small screen tells me right away if the composition is good or not.

I believe that a poor image cannot be fixed with a software so I prefer to take the time to compose my images while I am in the field. I also prefer to spend my time outside rather than in front of my computer!

If you’re ready to learn how to get better images, sign up for an upcoming workshop or ask for a private workshop.

mussels on pipeline.jpg